
Introduction
Watercolor flowers evoke a sense of tranquility and beauty, capturing the ephemeral nature of blossoms with delicate strokes and vibrant hues. Whether you're an experienced artist or a novice seeking to explore the world of watercolor painting, there's something inherently captivating about bringing floral scenes to life on paper. In this comprehensive guide, we'll delve into the art of painting watercolor flowers, exploring techniques, materials, and inspiration to help you embark on your creative journey.
The Allure of Watercolor Flowers
Flowers have long been a subject of fascination and inspiration for artists across centuries and cultures. Their intricate shapes, vivid colors, and symbolic meanings make them a perennial favorite in art. From the romanticism of roses to the exuberance of sunflowers, each bloom carries its own unique charm and character, inviting artists to capture its essence on canvas or paper.
What sets watercolor apart as a medium for painting flowers is its inherent fluidity and transparency. Unlike opaque mediums such as oil or acrylic, watercolor allows light to pass through layers of pigment, lending a luminous quality to the artwork. This luminosity is particularly well-suited to portraying the delicate petals and subtle gradations of color found in flowers, creating a sense of depth and vibrancy that is unmatched by other mediums.
Why Watercolor is Ideal for Painting Flowers
The transparent nature of watercolor lends itself beautifully to capturing the translucent quality of flower petals, allowing artists to layer colors and create subtle transitions from light to shadow. The medium's fluidity also enables spontaneous and expressive brushwork, perfect for conveying the organic shapes and movements of flowers.
Moreover, watercolor's quick drying time and portability make it an ideal choice for painting en plein air, allowing artists to immerse themselves in nature and capture the fleeting beauty of blooms in their natural environment. Whether you're painting in the comfort of your studio or amidst a field of wildflowers, watercolor offers unparalleled versatility and spontaneity.
Overview of What the Article Will Cover
In the sections that follow, we'll explore everything you need to know to paint watercolor flowers with confidence and creativity. We'll start by covering the essential materials and techniques needed to get started, including tips for selecting reference images and understanding the anatomy of flowers. Then, we'll delve into step-by-step tutorials for painting popular flowers such as roses, sunflowers, and tulips, guiding you through the process from sketching to final touches.
For those looking to take their skills to the next level, we'll also explore advanced techniques such as glazing, incorporating mixed media, and adding backgrounds and foliage to enhance your floral compositions. Along the way, we'll provide troubleshooting tips for common issues and share inspiration and resources to fuel your creative exploration.
Whether you're a seasoned watercolor artist or a curious beginner, there's something magical about the process of painting flowers in watercolor. So, let's gather our brushes and palette, and embark on a journey to capture the timeless beauty of nature's most beloved blooms.
Getting Started with Watercolor
Before diving into the colorful world of watercolor flowers, it's essential to equip yourself with the right tools and techniques. In this section, we'll explore the fundamental materials needed for watercolor painting and provide an overview of key techniques to help you get started on your artistic journey.
Brief Introduction to Watercolor Painting Techniques
Watercolor painting is a versatile medium that relies on the transparent qualities of water-soluble pigments. Unlike other painting mediums, such as oil or acrylic, watercolor is characterized by its fluidity and spontaneity. Here are some essential techniques to familiarize yourself with:
Wet-on-Wet Technique: This technique involves applying wet paint onto a wet surface, allowing colors to blend and bleed together seamlessly. It's ideal for creating soft transitions and atmospheric effects.
Wet-on-Dry Technique: In contrast, the wet-on-dry technique involves applying wet paint onto a dry surface. This technique allows for more control over brushstrokes and detail, making it suitable for adding fine lines and intricate details.
Layering Colors: Watercolor is a transparent medium, which means that colors can be built up through multiple layers to achieve depth and richness. Layering colors allows you to create subtle variations and gradients within your painting.
Creating Texture and Depth: By experimenting with different brushstrokes, washes, and techniques such as dry brushing or splattering, you can add texture and visual interest to your watercolor paintings.
Negative Painting Technique: This technique involves painting the spaces around the subject to define its shape and form. Negative painting can be used to create intricate details and highlights within a composition.
Essential Materials Needed for Painting Watercolor Flowers
To begin your watercolor flower painting journey, you'll need a few basic materials. Here's a list of essential supplies to get you started:
Watercolor Paper: Choose a high-quality watercolor paper that is heavyweight and specifically designed for watercolor painting. Cold-pressed paper with a textured surface is ideal for creating texture and absorbing watercolor washes.

Watercolor Paper Pad with 24 Sheets - Strathmore 300 Series
Create Beautiful Watercolor Paintings with Premium Strathmore 300 Series Paper Pad
Product information
$15.35 $13.73
Product Review Score
4.24 out of 5 stars
158 reviewsProduct links
Brushes: Invest in a variety of watercolor brushes in different shapes and sizes, including round, flat, and filbert brushes. Synthetic or natural hair brushes are suitable for watercolor painting, with each type offering unique qualities and effects.
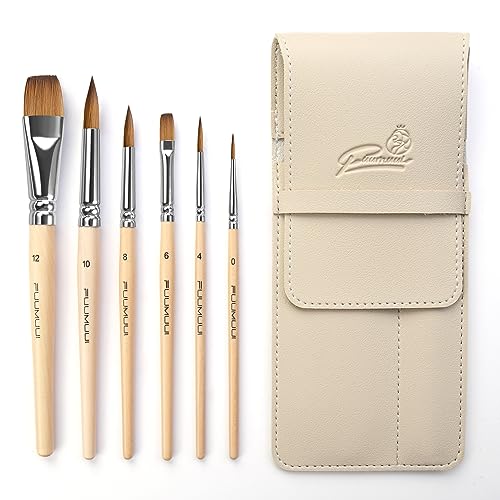
Professional Sable Watercolor Brushes for Artists - 6pcs
Upgrade your painting experience with these 6pcs professional sable watercolor brushes ideal for artists
Product information
$19.89
Product Review Score
4.59 out of 5 stars
49 reviewsProduct links
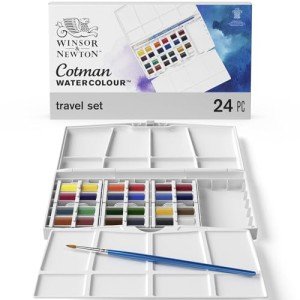
Watercolor Paints: Select a set of high-quality watercolor paints in a range of colors. Opt for professional-grade paints with vibrant pigments and excellent lightfastness for superior color intensity and longevity.
Palette: Use a palette with wells or mixing areas to hold and mix your watercolor paints. Ceramic, plastic, or porcelain palettes are suitable for watercolor painting and can be easily cleaned between painting sessions.
Water Container: Keep a container of clean water nearby for rinsing your brushes and diluting your paints. A large container with a wide opening is ideal for watercolor painting, allowing you to easily access and change the water as needed.
Other Optional Materials: Additional materials such as masking fluid, watercolor pencils, or masking tape can be useful for creating specific effects or adding details to your watercolor paintings.
By gathering these essential materials and familiarizing yourself with basic watercolor techniques, you'll be well-prepared to embark on your watercolor flower painting adventure. In the next section, we'll explore the importance of understanding flowers and how to select reference images for your paintings.
Understanding Flowers
To paint watercolor flowers convincingly, it's crucial to have a basic understanding of their anatomy, characteristics, and visual appeal. In this section, we'll delve into the anatomy of flowers and discuss the importance of observation and reference images in capturing their beauty on paper.
Anatomy of a Flower
Flowers are intricate structures composed of various parts, each serving a specific function in the plant's reproductive process. While the exact anatomy of a flower may vary depending on the species, most flowers consist of the following essential parts:
Petal: The petals are often the most visually striking part of the flower, serving to attract pollinators with their vibrant colors and patterns. Petals come in a wide range of shapes, sizes, and textures, from delicate and translucent to bold and velvety.
Sepal: Located beneath the petals, the sepals are leaf-like structures that protect the flower bud before it blooms. Sepals can vary in number and appearance, with some flowers having fused sepals that form a protective covering around the bud.
Stamen: The stamen is the male reproductive organ of the flower, consisting of a filament and an anther. The anther produces pollen, which is transferred to the female reproductive organs of other flowers during pollination.
Pistil: The pistil is the female reproductive organ of the flower, consisting of three main parts: the stigma, style, and ovary. The stigma is the receptive surface where pollen grains land and germinate, while the style connects the stigma to the ovary, where the ovules develop into seeds after fertilization.
Receptacle: The receptacle is the swollen base of the flower where all the floral parts are attached. It provides support and nourishment to the developing flower and eventually becomes the fruit or seed-bearing structure after fertilization.
Understanding the anatomy of flowers can help you accurately depict their form, structure, and details in your watercolor paintings. By observing and studying real flowers or reference images, you can gain a deeper appreciation for their complexity and beauty, allowing you to capture their essence more convincingly on paper.
The Importance of Observation
Observation is a fundamental skill for any artist, especially when it comes to painting natural subjects such as flowers. Take the time to study real flowers up close, paying attention to their shape, color, texture, and patterns. Notice how light interacts with the petals, casting shadows and creating highlights that add depth and dimension to the flower's form.
When observing flowers, consider the following:
Shape and Form: Observe the overall shape and structure of the flower, as well as the individual shapes of its petals, sepals, and other floral parts. Notice any variations in size, symmetry, or arrangement that give each flower its unique character.
Color and Value: Pay attention to the colors present in the flower, as well as the subtle variations in hue, saturation, and value. Notice how colors change in different lighting conditions or at different stages of the flower's life cycle.
Texture and Detail: Examine the surface texture of the petals, leaves, and other floral parts, noting any veins, ridges, or hairs that contribute to the flower's texture and visual interest. Look for intricate details such as patterns, markings, or irregularities that add character to the flower.
By honing your powers of observation and immersing yourself in the beauty of real flowers, you'll develop a deeper understanding and appreciation for their unique qualities. This firsthand knowledge will inform and enrich your watercolor paintings, allowing you to capture the essence of flowers with greater accuracy and expression.
Selecting Reference Images
Reference images are invaluable tools for watercolor artists, providing a visual guide and source of inspiration for their paintings. When selecting reference images for painting watercolor flowers, consider the following factors:
Quality: Choose high-resolution images with clear details and accurate colors to ensure that you can see and replicate the subtle nuances of the flowers accurately.
Composition: Look for reference images with interesting compositions and perspectives that highlight the unique features and beauty of the flowers. Consider cropping or editing the image to focus on specific details or create a more dynamic composition.
Variety: Experiment with different types of flowers, colors, and arrangements to expand your repertoire and challenge yourself as an artist. Explore a wide range of floral subjects, from simple single blooms to intricate bouquets or garden scenes.
Personal Connection: Select reference images that resonate with you personally and evoke a strong emotional response. Whether it's a favorite flower from your garden or a striking bloom you encountered on a nature walk, painting from a place of genuine interest and passion will infuse your artwork with authenticity and depth.
By carefully selecting and studying reference images, you can enhance your understanding of flowers and their visual characteristics, providing a solid foundation for your watercolor painting endeavors. In the next section, we'll explore basic techniques for painting watercolor flowers, from applying washes to creating texture and depth.
Basic Techniques for Painting Watercolor Flowers
Now that you have a solid understanding of the anatomy of flowers and the importance of observation, let's dive into the basic techniques for painting watercolor flowers. Whether you're a beginner or an experienced artist looking to refine your skills, mastering these fundamental techniques will help you bring your floral compositions to life with confidence and creativity.
Wet-on-Wet Technique
The wet-on-wet technique involves applying wet paint onto a wet surface, allowing colors to blend and bleed together seamlessly. This technique is perfect for creating soft transitions and atmospheric effects in your watercolor flower paintings.
Prepare Your Surface: Begin by wetting the surface of your watercolor paper with clean water using a brush or spray bottle. Ensure that the paper is evenly damp but not dripping wet.
Apply Your Base Wash: With your paper still wet, apply a loose wash of color using a large brush. Allow the colors to flow and mingle on the surface of the paper, creating soft gradients and transitions between hues.
Add Details and Define Shapes: While the paper is still wet, use a smaller brush to add more concentrated colors and define the shapes of your flowers. Allow the wet paint to blend and bleed into the surrounding wash, creating natural-looking transitions and soft edges.
Experiment with Layering: Continue to layer additional washes and colors as needed, building up the intensity and depth of your painting. Take advantage of the wet surface to blend and manipulate the paint, creating interesting textures and effects.
Allow to Dry: Once you're satisfied with the overall look of your painting, allow it to dry completely before adding any final details or touches. Be patient and avoid disturbing the surface of the paper while it dries to prevent unwanted streaks or blooms.
Wet-on-Dry Technique
In contrast to the wet-on-wet technique, the wet-on-dry technique involves applying wet paint onto a dry surface. This technique offers more control over brushstrokes and detail, making it ideal for adding fine lines and intricate details to your watercolor flower paintings.
Start with a Dry Surface: Begin by ensuring that your watercolor paper is completely dry before starting to paint. This will allow you to achieve crisp edges and defined shapes in your floral compositions.
Mix Your Paint: Mix your watercolor paints to the desired consistency and color intensity, using a palette or mixing tray. Adjust the ratio of water to pigment to achieve the desired opacity and fluidity.
Apply Your Base Colors: Using a medium-sized brush, apply your base colors to the dry paper, working from light to dark. Use light, controlled brushstrokes to define the shapes of your flowers and establish the overall composition.
Add Details and Shadows: Once the base wash has dried, use a smaller brush to add details such as petals, leaves, and stems to your flowers. Pay attention to the natural forms and textures of the flowers, using varying brushstrokes and colors to create depth and dimension.
Build Up Layers: Continue to layer additional washes and colors as needed, gradually building up the complexity and richness of your painting. Allow each layer to dry before adding the next to prevent colors from bleeding together or becoming muddy.
Final Touches: Once you're happy with the overall look of your painting, step back and assess it from a distance. Make any final adjustments or additions as needed to enhance the composition and balance of the artwork.
Layering Colors
Layering colors is a fundamental technique in watercolor painting that allows you to achieve depth, richness, and complexity in your floral compositions. By layering transparent washes of color on top of one another, you can create subtle variations and gradients that bring your flowers to life on paper.
Start with Light Washes: Begin by applying light washes of color to establish the base tones and values of your flowers. Use a large brush and plenty of water to create smooth, even washes that cover the entire surface of the paper.
Build Up Colors Gradually: Layer additional washes of color on top of the base wash, gradually building up the intensity and complexity of the colors. Allow each layer to dry completely before adding the next to prevent colors from bleeding together or becoming muddy.
Experiment with Transparency: Take advantage of the transparent nature of watercolor paints to create interesting effects and transitions between colors. Allow the underlying layers to show through in places, creating depth and luminosity in your floral compositions.
Pay Attention to Values: Pay close attention to the values (lightness or darkness) of your colors as you layer them. Use lighter tones for areas of highlight and darker tones for areas of shadow, creating contrast and dimension in your paintings.
Add Details and Accents: Once you've established the overall structure and colors of your flowers, use smaller brushes and more concentrated pigments to add details such as veins, stamens, and highlights. Pay attention to the natural forms and textures of the flowers, using varying brushstrokes and colors to create interest and realism.
Creating Texture and Depth
Texture and depth are essential elements in watercolor flower paintings, adding visual interest and realism to your compositions. Experiment with different techniques and brushstrokes to create a variety of textures, from soft and velvety petals to rough and textured foliage.
Dry Brushing: Dry brushing involves using a brush with minimal water and paint to create textured effects on the surface of the paper. Load your brush with paint, then remove excess moisture by dabbing it on a paper towel or palette. Use short, controlled strokes to apply the paint to the paper, creating texture and highlights.
Splattering: Splattering is a fun and spontaneous technique that can add a sense of movement and energy to your watercolor paintings. Load a brush with paint, then flick or tap it against another brush or your finger to create fine droplets of paint on the paper. Experiment with different colors and angles to achieve the desired effect.
Salt and Alcohol Effects: Salt and alcohol can be used to create interesting textures and patterns in watercolor paintings. Sprinkle coarse salt or table salt onto wet paint to create subtle speckled effects, or apply rubbing alcohol to wet paint to create blooms and irregularities.
Masking Fluid: Masking fluid can be used to preserve areas of white or light color in your watercolor paintings, allowing you to create crisp highlights and accents. Apply the masking fluid using a brush or fine-tip applicator, then allow it to dry completely before painting over it with watercolor washes. Once the paint is dry, gently remove the masking fluid with an eraser or your fingers to reveal the preserved areas underneath.
Experiment with Different Brushes: Different brushes can create different textures and effects in your watercolor paintings. Experiment with a variety of brush shapes and sizes, including round, flat, and fan brushes, to achieve a range of textures and effects in your floral compositions.
By mastering these basic techniques for painting watercolor flowers, you'll be well on your way to creating beautiful and expressive floral compositions that capture the essence of nature's beauty. In the next section, we'll explore step-by-step tutorials for painting popular flowers such as roses, sunflowers, and tulips, guiding you through the process from sketching to final touches.
Step-by-Step Guide to Painting Popular Flowers
In this section, we'll delve into step-by-step tutorials for painting some of the most beloved flowers in watercolor. Whether you're drawn to the romantic elegance of roses, the cheerful vibrancy of sunflowers, or the graceful simplicity of tulips, these tutorials will provide you with the guidance and inspiration you need to bring these iconic blooms to life on paper.
Rose
Roses are often considered the epitome of beauty and romance, making them a popular subject for watercolor artists. Follow these steps to paint a simple yet stunning rose:
Sketching the Basic Shape: Start by lightly sketching the basic shape of the rose using a pencil. Focus on capturing the overall form of the flower, including the outer petals, inner petals, and center.
Applying Base Colors: Begin by applying a light wash of color to the petals using a large brush. Use a combination of red, pink, and yellow to create a soft, rosy hue. Allow the colors to blend and bleed together on the paper, creating natural-looking transitions and gradients.
Adding Details and Shadows: Once the base wash has dried, use a smaller brush to add details such as veins, ridges, and folds to the petals. Use darker shades of red and purple to create shadows and depth, focusing on areas where petals overlap or curve away from the light.
Final Touches: Once you're happy with the overall look of your rose, step back and assess it from a distance. Make any final adjustments or additions as needed to enhance the composition and balance of the artwork. Consider adding highlights with a fine brush or white gouache to add sparkle and dimension to the petals.
Sunflower
Sunflowers are known for their vibrant yellow petals and bold, cheerful appearance, making them a popular subject for watercolor paintings. Follow these steps to paint a bright and sunny sunflower:
Sketching the Basic Shape: Start by lightly sketching the basic shape of the sunflower using a pencil. Focus on capturing the large, round shape of the flower head, as well as the individual petals and center.
Applying Base Colors: Begin by applying a light wash of yellow to the petals using a large brush. Use short, controlled brushstrokes to create texture and movement in the petals, allowing the colors to blend and bleed together on the paper.
Adding Details and Highlights: Once the base wash has dried, use a smaller brush to add details such as ridges, folds, and shadows to the petals. Use darker shades of yellow and brown to create depth and dimension, focusing on areas where petals overlap or curve away from the light. Add highlights with a fine brush or white gouache to add sparkle and dimension to the petals.
Painting the Center: Once you're happy with the petals, paint the center of the sunflower using a combination of brown, black, and orange. Use short, jagged brushstrokes to create texture and depth in the center, focusing on the concentric rings of seeds and the fluffy disk florets in the center.
Final Touches: Once you've finished painting the sunflower, step back and assess it from a distance. Make any final adjustments or additions as needed to enhance the composition and balance of the artwork. Consider adding additional foliage or background elements to complete the scene.
Tulip
Tulips are known for their elegant simplicity and graceful curves, making them a popular subject for watercolor paintings. Follow these steps to paint a delicate and beautiful tulip:
Sketching the Basic Shape: Start by lightly sketching the basic shape of the tulip using a pencil. Focus on capturing the elongated, bell-shaped form of the flower, as well as the individual petals and stem.
Applying Base Colors: Begin by applying a light wash of color to the petals using a large brush. Use a combination of red, pink, and purple to create a soft, tulip hue. Allow the colors to blend and bleed together on the paper, creating natural-looking transitions and gradients.
Adding Details and Shadows: Once the base wash has dried, use a smaller brush to add details such as veins, ridges, and folds to the petals. Use darker shades of red and purple to create shadows and depth, focusing on areas where petals overlap or curve away from the light.
Painting the Stem and Leaves: Once you're happy with the petals, paint the stem and leaves of the tulip using a combination of green and yellow. Use long, flowing brushstrokes to create the graceful curves of the stem, and add veins and ridges to the leaves to create texture and depth.
Final Touches: Once you've finished painting the tulip, step back and assess it from a distance. Make any final adjustments or additions as needed to enhance the composition and balance of the artwork. Consider adding additional foliage or background elements to complete the scene.
By following these step-by-step tutorials, you'll be able to paint beautiful watercolor flowers with confidence and creativity. Experiment with different colors, compositions, and techniques to create your own unique interpretations of these iconic blooms. In the next section, we'll explore advanced techniques and tips for taking your watercolor flower paintings to the next level.
Advanced Techniques and Tips
Now that you've mastered the basics of painting watercolor flowers, it's time to explore some advanced techniques and tips to take your artwork to the next level. From creating luminous glazes to incorporating mixed media elements, these techniques will help you elevate your watercolor flower paintings with depth, complexity, and creativity.
Glazing to Create Luminosity
Glazing is a technique used in watercolor painting to create layers of transparent color that build up to form rich, luminous surfaces. By applying thin washes of color over dried layers of paint, you can achieve subtle variations and depth in your watercolor flower paintings.
Prepare Your Surface: Start by painting a base layer of color on your watercolor paper and allow it to dry completely. This will serve as the foundation for your glazes and provide a smooth surface for the paint to adhere to.
Mix Your Glazes: Mix your watercolor paints with plenty of water to create thin, transparent washes of color. Experiment with different color combinations and opacities to achieve the desired effect.
Apply the Glazes: Using a clean brush, apply the glazes to the dried surface of your painting, working from light to dark. Use broad, sweeping brushstrokes to cover large areas and smaller, more controlled strokes to add detail and definition.
Build Up Layers: Allow each layer of glaze to dry completely before applying the next layer. By building up multiple layers of transparent color, you can create depth, richness, and luminosity in your watercolor flower paintings.
Experiment with Color Mixing: As you apply the glazes, experiment with mixing colors directly on the paper to create subtle variations and gradients. Allow the colors to blend and bleed together naturally, creating interesting effects and transitions in your artwork.
Incorporating Mixed Media
Mixed media techniques can add visual interest and texture to your watercolor flower paintings, allowing you to experiment with a variety of materials and techniques to create unique and dynamic compositions.
Collage: Incorporate collage elements such as torn paper, fabric, or found objects into your watercolor flower paintings to add texture and dimension. Use a gel medium or adhesive to adhere the collage materials to the surface of your painting, then paint over them with watercolor washes to integrate them into the composition.
Texture Mediums: Experiment with texture mediums such as gesso, modeling paste, or gel medium to create raised textures and patterns in your watercolor flower paintings. Apply the texture medium to the surface of your painting using a palette knife or brush, then paint over it with watercolor washes to highlight the texture and create visual interest.
Ink and Pen: Use waterproof ink pens or markers to add fine lines, details, and accents to your watercolor flower paintings. Experiment with different line weights and styles to create dynamic compositions and enhance the realism of your artwork.
Masking Techniques: Explore masking techniques such as masking fluid or masking tape to create crisp, clean edges and preserve areas of white or light color in your watercolor flower paintings. Apply the masking fluid or tape to the surface of your painting before painting, then remove it once the paint has dried to reveal the preserved areas underneath.
Collaborative Techniques: Collaborate with other artists or incorporate elements from other art forms such as photography, digital art, or printmaking into your watercolor flower paintings. Experiment with combining different media and techniques to create hybrid artworks that push the boundaries of traditional watercolor painting.
Adding Backgrounds and Foliage
Backgrounds and foliage can provide context and depth to your watercolor flower paintings, enhancing the overall composition and creating a sense of atmosphere and environment. Experiment with different techniques and styles to create dynamic backgrounds and lush foliage for your floral compositions.
Wet-in-Wet Backgrounds: Use the wet-in-wet technique to create soft, atmospheric backgrounds for your watercolor flower paintings. Wet the surface of your paper with clean water, then apply washes of color using broad, sweeping brushstrokes. Allow the colors to blend and bleed together naturally, creating subtle variations and gradients in the background.
Dry Brushing and Splattering: Experiment with dry brushing and splattering techniques to add texture and movement to your backgrounds. Use a dry brush to apply thin washes of color or splatter paint onto the surface of your painting using a toothbrush or flicking brush. Allow the paint to dry completely before adding additional layers or details.
Negative Painting: Use negative painting techniques to create intricate foliage and background elements in your watercolor flower paintings. Paint the spaces around the flowers and foliage, gradually building up layers of color to define the shapes and forms. Use darker colors and more concentrated washes to create depth and contrast in the negative space.
Foreground Elements: Experiment with adding foreground elements such as grasses, leaves, or branches to your watercolor flower paintings to create depth and perspective. Use a combination of wet-on-wet and wet-on-dry techniques to paint these elements, focusing on capturing their natural forms and textures.
Atmospheric Perspective: Use atmospheric perspective techniques to create a sense of depth and distance in your watercolor flower paintings. Paint background elements with cooler, lighter colors and softer edges to push them into the distance, while painting foreground elements with warmer, darker colors and sharper edges to bring them forward.
By incorporating these advanced techniques and tips into your watercolor flower paintings, you can push the boundaries of your creativity and create artworks that are vibrant, dynamic, and visually engaging. Experiment with different materials, techniques, and styles to discover new ways of expressing yourself and capturing the beauty of nature's most beloved blooms.
In the next section, we'll explore troubleshooting common issues that arise during the watercolor painting process and provide tips for overcoming them to achieve successful results.
Troubleshooting Common Issues
While painting watercolor flowers can be a delightful and rewarding experience, it's not uncommon to encounter challenges along the way. In this section, we'll explore some common issues that arise during the watercolor painting process and provide practical tips and solutions for overcoming them to achieve successful results.
Muddy Colors
One of the most common challenges in watercolor painting is the tendency for colors to become muddy or dull, especially when multiple colors mix together on the paper. This can result in a lack of clarity and vibrancy in your artwork. Here are some tips for avoiding muddy colors:
Limit Your Palette: Use a limited palette of colors to avoid overwhelming your painting with too many hues. Choose a few primary and secondary colors that harmonize well together and mix them to create a wide range of colors.
Allow Layers to Dry: Allow each layer of paint to dry completely before adding additional layers on top. This will prevent colors from blending together and becoming muddy. Use a hairdryer or fan to speed up the drying process if necessary.
Use Transparent Colors: Transparent watercolor paints tend to produce clearer, more vibrant colors than opaque paints. Opt for transparent pigments whenever possible, and avoid mixing opaque colors together to prevent muddy results.
Plan Your Layers: Plan your painting in layers, starting with light washes of color and gradually building up to darker tones and details. Work from light to dark to avoid inadvertently mixing wet paint and creating muddy colors.
Clean Your Palette: Keep your palette clean and free of dried paint buildup to prevent contamination of your colors. Use a spray bottle or palette knife to mist your palette with water and reactivate dried paint, then wipe it away with a paper towel or sponge.
Overworking the Painting
Another common issue in watercolor painting is the tendency to overwork the painting, resulting in muddy colors, lost details, and a lack of freshness in the artwork. Here are some tips for avoiding overworking your painting:
Work Quickly and Spontaneously: Watercolor painting is all about spontaneity and freshness. Work quickly and confidently, using bold brushstrokes and decisive marks to capture the essence of your subject.
Know When to Stop: Know when to stop painting and resist the urge to keep adding more details or layers. Step back and assess your painting from a distance, and if it feels complete, trust your instincts and leave it be.
Embrace Imperfection: Embrace imperfection and embrace the natural unpredictability of watercolor painting. Allow drips, blooms, and other happy accidents to happen, as they can add character and visual interest to your artwork.
Use Negative Space: Use negative space to your advantage by leaving areas of the paper untouched to create highlights and contrast. Use a light touch and leave some areas of the paper bare to allow light to shine through and create luminous effects.
Let it Dry: Allow your painting to dry completely between layers to avoid disturbing wet paint and creating muddy colors. Use a hairdryer or fan to speed up the drying process if necessary, but be careful not to overheat the paper.
Achieving Balance and Harmony
Achieving balance and harmony in your watercolor flower paintings can be challenging, especially when working with multiple colors and elements. Here are some tips for achieving balance and harmony in your artwork:
Plan Your Composition: Plan your composition carefully before you begin painting, considering the placement of your flowers, foliage, and background elements. Use thumbnail sketches or a viewfinder to experiment with different arrangements and compositions.
Use Color Theory: Use color theory principles such as complementary colors, analogous colors, and color harmonies to create a sense of balance and unity in your painting. Experiment with different color combinations and palettes to find what works best for your subject.
Create Visual Flow: Create visual flow in your painting by leading the viewer's eye through the composition with lines, shapes, and contrasts. Use leading lines, diagonal compositions, and focal points to create movement and interest in your artwork.
Simplify and Edit: Simplify your composition by eliminating unnecessary details and focusing on the essential elements of your subject. Edit your painting as you go, removing or adjusting elements that detract from the overall harmony and balance of the artwork.
Step Back and Assess: Step back and assess your painting from a distance periodically to evaluate the balance, harmony, and overall impact of your artwork. Make any necessary adjustments or refinements to achieve the desired result.
By applying these troubleshooting tips and techniques to your watercolor flower paintings, you can overcome common challenges and achieve successful results. Remember to practice patience, persistence, and experimentation as you continue to develop your skills and refine your artistic vision.
In the final section of this article, we'll explore inspiration and further resources to fuel your creativity and help you continue your journey as a watercolor artist.
Finding Inspiration and Further Resources
As you continue your journey into the world of watercolor flower painting, it's essential to seek inspiration and access additional resources to fuel your creativity and expand your knowledge. In this final section, we'll explore avenues for finding inspiration and recommend further resources to support your artistic growth.
Finding Inspiration
Nature: Nature is perhaps the most abundant source of inspiration for watercolor flower painting. Take time to explore gardens, parks, and natural landscapes to observe flowers in their natural habitat. Pay attention to the play of light and shadow, the variety of colors and shapes, and the intricate details of different flowers.
Art Galleries and Museums: Visit art galleries and museums to view works by master watercolor artists and gain inspiration from their techniques and compositions. Study paintings of flowers by artists such as Georgia O'Keeffe, Claude Monet, and Pierre-Auguste Renoir to see how they approached the subject with creativity and imagination.
Books and Magazines: Explore books and magazines dedicated to watercolor painting and botanical art for inspiration and ideas. Look for books featuring tutorials, step-by-step demonstrations, and galleries of watercolor flower paintings to spark your creativity and expand your repertoire of techniques.
Online Communities: Join online communities and forums dedicated to watercolor painting to connect with fellow artists, share ideas and techniques, and gain inspiration from their work. Platforms such as Instagram, Pinterest, and Facebook are excellent places to discover and connect with artists from around the world.
Personal Experiences: Draw inspiration from your own experiences and memories of flowers. Reflect on moments spent in flower-filled gardens, memorable bouquets received on special occasions, or cherished floral landscapes from your travels. Use these personal connections to infuse your artwork with authenticity and emotion.
Further Resources
Books: Explore books on watercolor flower painting, botanical art, and floral illustration for in-depth instruction and inspiration. Some recommended titles include "Watercolor Flower Artist's Bible" by Claire Waite Brown, "Botanical Illustration Course" by Rosie Martin and Meriel Thurstan, and "The Watercolor Flower Painter's A to Z" by Adelene Fletcher.
Online Courses: Enroll in online courses and workshops to learn new techniques and refine your skills in watercolor flower painting. Websites such as Skillshare, Udemy, and Domestika offer a wide range of courses taught by experienced artists and instructors.
Art Supplies: Invest in high-quality art supplies and materials to support your artistic endeavors. Look for professional-grade watercolor paints, brushes, and paper that are specifically designed for watercolor painting to achieve the best results in your artwork.
Local Workshops: Attend local workshops and classes hosted by art schools, community centers, or independent artists to learn from experienced instructors and connect with other artists in your area. Check local listings and event calendars for upcoming workshops and events.
Art Exhibitions: Visit art exhibitions and shows featuring watercolor flower paintings to gain inspiration and appreciation for the medium. Attend artist talks, demonstrations, and workshops held in conjunction with exhibitions to deepen your understanding and engagement with the artwork.
By seeking inspiration from diverse sources and accessing additional resources, you can continue to develop your skills and expand your artistic horizons in watercolor flower painting. Remember to stay curious, experiment with new techniques, and find joy in the process of creating art.
As you embark on your creative journey, embrace the beauty of nature, the wisdom of fellow artists, and the boundless possibilities of the watercolor medium. With dedication, passion, and perseverance, your watercolor flower paintings will flourish and bloom, reflecting your unique voice and vision as an artist.
Keep painting, keep exploring, and keep blooming. The world is waiting to see your artistic brilliance unfold.
Conclusion
Watercolor flower painting is a journey of exploration, creativity, and self-expression. Throughout this article, we've delved into the fundamentals of watercolor painting, explored techniques for capturing the beauty of flowers, and provided tips for overcoming common challenges. As you continue your artistic journey, remember the following key takeaways:
Observe and Appreciate: Take the time to observe and appreciate the natural beauty of flowers in all their intricacy and diversity. Study their forms, colors, and textures, and let them inspire your artwork.
Practice Patience and Persistence: Watercolor painting requires patience and persistence to master. Embrace the process of learning and experimentation, and don't be afraid to make mistakes along the way.
Experiment and Explore: Be open to experimenting with different techniques, materials, and styles in your watercolor flower paintings. Allow yourself the freedom to explore and discover what resonates with you as an artist.
Seek Inspiration: Draw inspiration from nature, art, and personal experiences to fuel your creativity and imagination. Surround yourself with sources of inspiration and engage with fellow artists to share ideas and insights.
Celebrate Your Progress: Celebrate your progress and achievements as you continue to develop your skills and refine your artistic voice. Each painting is an opportunity for growth and learning, so embrace the journey and enjoy the process.
Whether you're a beginner just starting out or an experienced artist looking to expand your repertoire, watercolor flower painting offers endless possibilities for creative expression and artistic exploration. Keep exploring, keep creating, and keep blooming as an artist.
As you embark on your artistic journey, remember that the most important thing is to enjoy the process and express yourself authentically through your artwork. Let your passion for painting flowers shine through in every brushstroke, and let your creativity blossom with each new painting you create.
With dedication, practice, and a touch of inspiration, your watercolor flower paintings will continue to evolve and flourish, bringing joy and beauty to those who behold them. So pick up your brushes, set up your palette, and let your imagination take flight as you paint the world in vibrant, living color.
Happy painting, and may your artistic journey be as beautiful and fulfilling as the flowers that inspire you.