Introduction
Oil painting is a timeless art form that has captivated artists and art enthusiasts for centuries. Its rich history, vibrant colors, and versatile techniques make it a favorite medium for both beginners and seasoned artists alike. In this comprehensive guide, we will explore the fundamentals of oil painting, providing invaluable insights and practical tips for beginners who are eager to embark on their creative journey.
Understanding the Allure of Oil Painting
Oil painting holds a special allure that sets it apart from other artistic mediums. Its unique characteristics, such as its slow drying time and rich, luminous colors, allow artists to achieve remarkable depth and texture in their work. Unlike watercolors or acrylics, which dry quickly and can be challenging to manipulate, oil paints remain workable for extended periods, giving artists the freedom to blend and refine their compositions with ease.
Importance of Oil Painting for Beginners
For beginners, oil painting offers a perfect blend of challenge and reward. While mastering the techniques of oil painting may take time and practice, the learning process itself can be immensely fulfilling. Through experimentation and exploration, beginners can discover their unique artistic style and express themselves in ways they never thought possible. Moreover, the meditative and therapeutic nature of oil painting provides a welcome escape from the stresses of everyday life, allowing individuals to immerse themselves fully in the creative process.
What to Expect from the Article
In the following sections, we will delve into the essential aspects of oil painting, covering everything from selecting the right materials to mastering fundamental techniques. We will provide step-by-step instructions for creating your first oil painting, along with troubleshooting tips for common beginner mistakes. Additionally, we will offer valuable resources and recommendations for further learning, ensuring that beginners have all the tools they need to embark on their oil painting journey with confidence and enthusiasm.
As we embark on this artistic adventure together, remember that oil painting is not just about creating beautiful artworks; it's about embracing creativity, exploring the boundless possibilities of color and form, and finding joy in the process of self-expression. So, without further ado, let's dive into the captivating world of oil painting and unleash our inner artists onto the canvas.
Getting Started with Oil Painting
Embarking on your journey into oil painting can be both exciting and daunting. In this section, we will guide you through the essential steps to help you get started with confidence.
Understanding the Basics of Oil Painting
Materials Needed
The foundation of any successful oil painting endeavor lies in acquiring the right materials. Here's a comprehensive look at the essential supplies you'll need:
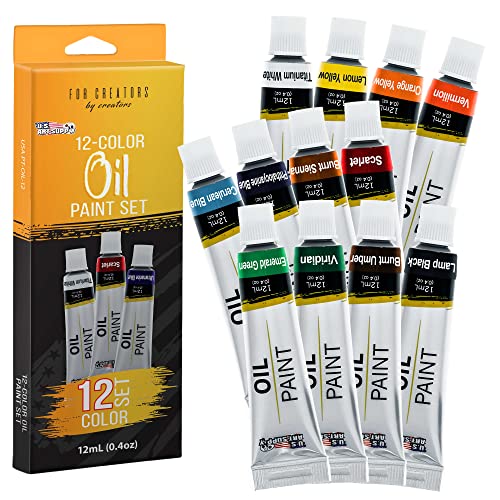
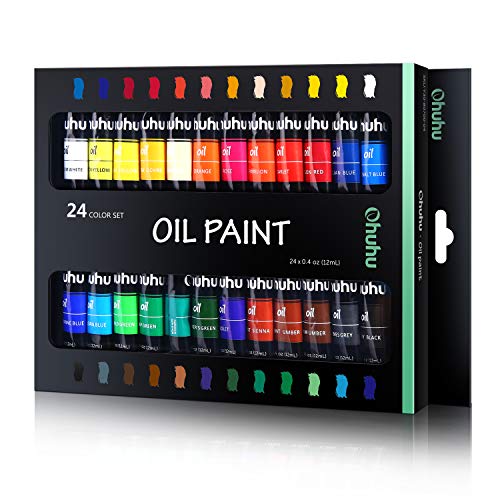
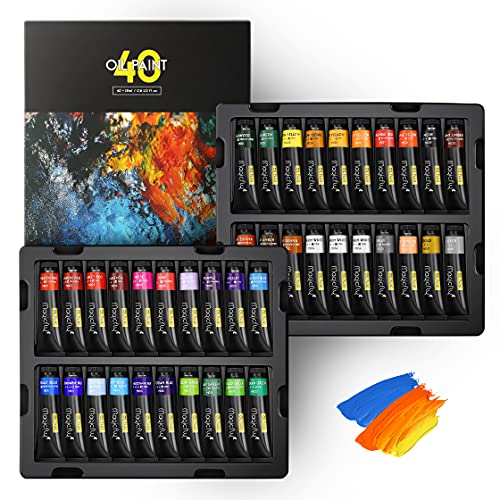
Oil Paints: Invest in high-quality oil paints to ensure vibrant colors and lasting results. Consider starting with a basic palette of primary colors (red, blue, yellow), white, and earth tones (such as burnt sienna and raw umber). Gradually expand your collection as you gain experience.
Brushes: Select a variety of brushes in different shapes and sizes to accommodate various techniques and applications. Hog hair brushes are commonly used for their resilience and ability to hold paint, while synthetic brushes offer smooth and precise strokes.
Canvas: Canvas is the traditional surface for oil painting due to its durability and texture. Choose between stretched canvases, canvas boards, or canvas pads based on your preferences and project requirements. Experiment with different sizes and priming options to find what works best for you.
Palette: A palette serves as your mixing surface, allowing you to blend colors and test out different combinations. Wooden palettes are popular for their sturdiness and longevity, but disposable palette pads offer convenience and easy cleanup.
Mediums: Oil painting mediums help modify the consistency, drying time, and finish of your paints. Common mediums include linseed oil, walnut oil, and alkyd mediums. Experiment with different mediums to achieve desired effects and enhance the handling properties of your paints.
Palette Knife: Palette knives are invaluable tools for mixing paint directly on the palette and applying thick impasto layers onto the canvas. They also allow for precise mark-making and texture creation.
Easel: While not essential, an easel provides a stable and adjustable surface for your canvas, allowing you to work comfortably and maintain proper posture during extended painting sessions.
Setting Up Your Workspace
Creating a conducive workspace is essential for a productive and enjoyable painting experience. Consider the following factors when setting up your painting area:
Ventilation: Ensure adequate ventilation to disperse fumes from oil paints and mediums. Open windows or use a fan to improve air circulation, especially when working with solvents.
Lighting: Good lighting is crucial for accurate color perception and detail work. Position your workspace near natural light sources or invest in adjustable lamps with daylight bulbs to illuminate your painting area effectively.
Organization: Keep your painting supplies organized and within reach to streamline your workflow. Consider using storage solutions such as caddies, drawers, or shelving units to maintain order and prevent clutter.
Protection: Protect your work surface with a drop cloth or plastic sheeting to prevent spills and stains. Consider investing in a solvent-resistant mat for easy cleanup and added durability.
Comfort: Prioritize comfort and ergonomics to prevent fatigue and discomfort during long painting sessions. Use a comfortable chair with adequate support, and consider using a standing desk or adjustable easel to customize your working height.
By gathering the right materials and setting up your workspace thoughtfully, you'll create an environment conducive to creativity and productivity. Now that you've prepared your materials and workspace, it's time to explore the world of oil paints and unleash your creativity onto the canvas.
Essential Techniques for Beginners
Mastering the fundamental techniques of oil painting is crucial for creating compelling artworks and building confidence as an artist. In this section, we'll explore the essential techniques that every beginner should know, along with practical tips for honing your skills.
Brushwork Fundamentals
Types of Brushes and Their Uses
Brushes are your primary tools for applying paint to the canvas, and understanding their characteristics and uses is essential for achieving the desired effects in your paintings. Here are some common types of brushes and their typical uses:
Round Brushes: These versatile brushes have a pointed tip and can be used for detailed work, as well as broader strokes when used on their sides.
Flat Brushes: Flat brushes have a rectangular shape with squared-off bristles, making them ideal for bold strokes, blocking in shapes, and creating sharp edges.
Filbert Brushes: Filbert brushes have a rounded tip with slightly flattened bristles, resembling a filbert or almond shape. They are excellent for blending, softening edges, and creating smooth transitions between colors.
Fan Brushes: Fan brushes have bristles arranged in a spread-out fan shape, making them suitable for creating texture, blending, and applying thin glazes.
Palette Knives: While not technically brushes, palette knives are indispensable tools for applying paint thickly, creating impasto effects, and mixing colors on the palette.
Experiment with different brush shapes, sizes, and bristle types to discover which ones work best for your painting style and preferences.
Brushstroke Techniques
Mastering various brushstroke techniques is key to achieving a wide range of effects and textures in your oil paintings. Here are some fundamental brushstroke techniques to practice:
Blending: Use soft, overlapping brushstrokes to blend colors seamlessly and create smooth transitions between hues. Experiment with different blending techniques, such as wet-on-wet blending and dry brushing, to achieve different effects.
Layering: Build up layers of paint gradually to add depth and dimension to your paintings. Start with thin, transparent layers of paint and gradually increase opacity as needed.
Impasto: Apply thick, textured layers of paint using palette knives or stiff brushes to create impasto effects. Experiment with layering different colors and textures to add visual interest and tactile appeal to your paintings.
Scumbling: Use a dry brush and a light touch to apply thin, broken layers of paint over existing layers to create a sense of depth and atmosphere. Scumbling is especially effective for creating soft, atmospheric effects such as clouds or foliage.
By mastering these fundamental brushwork techniques, you'll gain greater control over your paintings and be able to express your artistic vision more effectively. Remember to practice regularly and experiment with different brushes, strokes, and techniques to develop your unique style as an oil painter.
Step-by-Step Guide to Your First Oil Painting
Embarking on your first oil painting can be an exhilarating experience, but it can also feel overwhelming for beginners. In this section, we'll provide a step-by-step guide to help you navigate the process with confidence and create a stunning masterpiece.
Choosing a Simple Subject
Before you begin painting, take some time to choose a simple subject that inspires you. Consider starting with still life compositions, landscapes, or simple objects such as fruit or flowers. Look for subjects with clear shapes, interesting textures, and contrasting colors to make your painting more visually appealing.
Sketching and Transferring the Composition
Once you've chosen your subject, sketch out the basic composition on your canvas using a pencil or charcoal. Pay attention to the placement of objects, proportions, and overall balance of the composition. Make any necessary adjustments until you're satisfied with the layout.
Once you've finalized your sketch, transfer the composition onto the canvas using a light underdrawing. You can use a grid method, tracing paper, or a projector to transfer your sketch accurately onto the canvas.
Blocking In Colors and Shapes
With your composition transferred onto the canvas, it's time to start blocking in colors and shapes. Begin by mixing your paint colors on the palette, starting with the largest areas of color first. Use broad brushstrokes to fill in the basic shapes and forms, focusing on capturing the overall values and proportions of your subject.
As you work, remember to step back frequently to assess your progress and make any necessary adjustments. Don't worry about getting every detail perfect at this stage—focus on capturing the essence of your subject and establishing a solid foundation for your painting.
Refining Details and Adding Depth
Once you've blocked in the basic colors and shapes, it's time to start refining the details and adding depth to your painting. Begin by gradually building up layers of paint, starting with the background and working your way forward. Pay attention to subtle shifts in color, value, and texture, and use a variety of brushstrokes to create interest and dimension.
As you work, continue to reference your subject and observe how light interacts with the forms. Look for areas of highlights and shadows, and use them to create a sense of volume and three-dimensionality in your painting. Don't be afraid to experiment with different techniques and approaches as you refine your painting.
Final Touches and Finishing
Once you're happy with the overall composition and level of detail in your painting, it's time to add the final touches and make any last-minute adjustments. Pay attention to small details such as highlights, reflections, and fine lines, and use them to enhance the realism and visual impact of your painting.
Step back and assess your painting from a distance to ensure that everything is balanced and harmonious. Make any final tweaks as needed, and then step back and admire your masterpiece!
Conclusion
Creating your first oil painting is a rewarding experience that requires patience, practice, and a willingness to experiment. By following this step-by-step guide and allowing yourself the freedom to explore and make mistakes, you'll gain valuable insights into the art of oil painting and develop your skills as an artist. So gather your materials, choose your subject, and let your creativity flow onto the canvas. Who knows? Your first oil painting may just be the beginning of a lifelong passion for this timeless art form.
Troubleshooting Common Beginner Mistakes
As with any new endeavor, learning oil painting comes with its fair share of challenges and pitfalls. In this section, we'll address some common mistakes that beginners often encounter and offer practical solutions to help you overcome them.
Overmixing Colors
One of the most common mistakes beginners make is overmixing their paint colors on the palette. Overmixing can result in muddy, dull colors that lack vibrancy and depth. To avoid this mistake, try the following tips:
Mix Colors Sparingly: Start with small amounts of paint on your palette and mix them gradually to achieve the desired color. Avoid mixing large quantities of paint at once, as this can lead to overmixing.
Use a Limited Palette: Limiting your palette to a few essential colors can help you avoid the temptation to overmix. Experiment with mixing primary colors to create a wide range of hues, and embrace the beauty of subtle color variations.
Clean Your Brushes Between Colors: Clean your brushes thoroughly between color mixtures to prevent contamination and ensure that your colors remain clean and vibrant.
Using Too Much Paint or Medium
Another common mistake beginners make is using too much paint or medium on their canvas. Applying too much paint can lead to thick, gloppy layers that take a long time to dry and can become muddy when mixed together. To avoid this mistake, try the following techniques:
Thin Your Paint: Thin your paint with a small amount of medium or solvent to achieve a smoother, more fluid consistency. Start with thin layers of paint and gradually build up thickness as needed.
Work in Layers: Instead of trying to cover the entire canvas with thick layers of paint all at once, work in thin layers and allow each layer to dry before adding additional paint. This will help prevent your colors from becoming muddy and allow you to build up depth and texture gradually.
Experiment with Different Brushes: Experiment with different brush sizes and types to achieve the desired effects. Soft brushes are great for blending and creating smooth transitions, while stiff brushes are ideal for applying thick impasto layers.
Ignoring Proper Brush Care and Maintenance
Proper brush care and maintenance are essential for preserving the longevity and performance of your brushes. Neglecting to clean and store your brushes properly can lead to dried, splayed bristles and diminished painting results. To keep your brushes in top condition, follow these tips:
Clean Your Brushes Thoroughly: After each painting session, clean your brushes thoroughly with soap and water or a specialized brush cleaner to remove any paint residue. Gently reshape the bristles and allow the brushes to air dry completely before storing them.
Store Your Brushes Properly: Store your brushes upright in a brush holder or container to prevent the bristles from becoming misshapen. Avoid storing brushes with the bristles facing down or resting on their sides, as this can cause the bristles to bend or splay over time.
Replace Damaged Brushes: If you notice any signs of damage or wear on your brushes, such as frayed bristles or a loose ferrule, it's time to replace them. Investing in high-quality brushes and taking proper care of them will save you time and money in the long run.
Not Allowing Layers to Dry Properly
Oil paint dries slowly, and attempting to work on wet layers can result in unwanted blending and smudging. It's essential to allow each layer of paint to dry thoroughly before applying additional layers or making adjustments. Here's how to ensure proper drying between layers:
Patience is Key: Allow each layer of paint to dry completely before adding additional layers or making adjustments. This may take anywhere from a few hours to several days, depending on factors such as paint thickness, temperature, and humidity.
Use a Medium: Adding a drying medium such as liquin or alkyd medium to your paint can help accelerate drying times and create a more stable surface for subsequent layers. Be sure to follow the manufacturer's instructions when using drying mediums.
Work on Multiple Canvases: If you're eager to continue painting while waiting for layers to dry, consider working on multiple canvases simultaneously. This will allow you to switch between paintings and keep your creative momentum going without compromising the quality of your work.
By addressing these common beginner mistakes and implementing the suggested solutions, you'll be better equipped to navigate the challenges of oil painting and achieve more satisfying results in your artwork. Remember that learning oil painting is a journey, and each mistake is an opportunity for growth and improvement. Embrace the process, stay patient, and keep experimenting with new techniques and approaches to refine your skills as an artist.
Resources for Further Learning
Continuing to learn and grow as an oil painter is essential for honing your skills and developing your artistic voice. In this section, we'll explore a variety of resources that can help you expand your knowledge, find inspiration, and connect with other artists within the oil painting community.
Books and Online Tutorials
Instructional Books:
Oil Painting for Dummies by Anita Marie Giddings and Sherry Stone Clifton offers a comprehensive introduction to oil painting techniques, materials, and methods, making it an excellent resource for beginners.
The Oil Painting Course You've Always Wanted: Guided Lessons for Beginners and Experienced Artists by Kathleen Lochen Staiger provides practical exercises and step-by-step demonstrations to help artists of all skill levels improve their oil painting skills.
Online Tutorials:
YouTube channels such as "Draw Mix Paint" by artist Mark Carder and "Oil Painting Techniques" by Andrew Tischler offer a wealth of free tutorials covering a wide range of oil painting topics, from basic techniques to advanced concepts.
Websites like Skillshare and Udemy offer online courses taught by experienced artists and instructors, allowing you to learn at your own pace and from the comfort of your home.
Art Communities and Forums
Online Forums:
Websites like WetCanvas and Artist Forum provide online communities where artists can share their work, ask questions, and connect with other oil painters from around the world. Participating in these forums can be a great way to receive feedback on your artwork and learn from the experiences of others.
Local Art Groups:
Consider joining a local art group or painting club in your area. These groups often host workshops, demonstrations, and plein air painting outings, providing opportunities to learn from experienced artists and connect with fellow oil painters in your community.
Local Classes and Workshops
Art Schools and Studios:
Many art schools and studios offer classes and workshops specifically focused on oil painting. Whether you're a beginner looking to learn the basics or an experienced artist seeking to refine your skills, taking a class or workshop can provide valuable hands-on instruction and feedback from knowledgeable instructors.
Community Centers and Recreation Programs:
Community centers, libraries, and recreation programs often offer affordable art classes and workshops for adults of all skill levels. These programs may cover a variety of topics, including oil painting techniques, color theory, and composition.
No matter where you are on your oil painting journey, there are plenty of resources available to help you learn, grow, and improve as an artist. Whether you prefer books, online tutorials, art communities, or hands-on classes, the key is to stay curious, keep experimenting, and never stop seeking out new opportunities for learning and inspiration.
By taking advantage of these resources and investing time and effort into your artistic development, you'll continue to evolve as an oil painter and unlock your full creative potential. So don't be afraid to explore new techniques, connect with other artists, and embrace the lifelong journey of artistic discovery. Happy painting!
Conclusion
Congratulations! You've embarked on an exciting journey into the captivating world of oil painting. As you've discovered throughout this guide, oil painting offers a rich and rewarding creative outlet that allows you to express yourself in unique and meaningful ways. As we conclude our exploration, let's reflect on the key insights and takeaways from your oil painting journey.
Recap of Key Points Covered in the Article
Understanding the Basics: We began by exploring the essential materials and techniques needed to get started with oil painting, from selecting the right paints and brushes to setting up your workspace for optimal creativity.
Mastering Fundamental Techniques: Next, we delved into the foundational techniques of oil painting, including brushwork fundamentals, composition, and basic painting techniques. By mastering these techniques, you've gained greater control over your paintings and developed a solid foundation for further exploration.
Step-by-Step Guide to Your First Oil Painting: Armed with knowledge and confidence, you followed a step-by-step guide to creating your first oil painting, from choosing a subject and sketching the composition to refining details and adding finishing touches. Through practice and perseverance, you've created a beautiful masterpiece that reflects your unique vision and style.
Troubleshooting Common Mistakes: Along the way, we addressed common mistakes that beginners often encounter in oil painting, such as overmixing colors, using too much paint or medium, neglecting proper brush care, and not allowing layers to dry properly. By implementing practical solutions and staying mindful of these pitfalls, you've learned valuable lessons that will help you avoid similar mistakes in the future.
Resources for Further Learning: Finally, we explored a variety of resources for further learning and growth as an oil painter, including books, online tutorials, art communities, local classes, and workshops. By continuing to seek out opportunities for learning and connecting with other artists, you'll continue to evolve and improve as an artist.
Encouragement for Beginners to Practice and Experiment
As you continue your journey into oil painting, remember that practice makes progress. Don't be afraid to experiment with new techniques, subjects, and styles, and embrace the process of trial and error as an essential part of your growth as an artist. Every brushstroke, every painting, and every mistake is an opportunity for learning and improvement.
Final Thoughts on the Journey of Learning Oil Painting
Oil painting is more than just a hobby or a skill—it's a lifelong journey of self-expression, discovery, and personal growth. As you immerse yourself in the creative process, remember to stay true to yourself, trust your instincts, and let your passion guide you. Whether you're painting for yourself, sharing your artwork with others, or pursuing professional opportunities, cherish the joy and fulfillment that oil painting brings to your life.
So go forth with confidence, curiosity, and creativity, and may your oil painting journey be filled with endless inspiration, beauty, and wonder. Happy painting!
This conclusion wraps up the guide by summarizing the key points covered, offering encouragement to beginners, and providing final thoughts on the journey of learning oil painting. It reinforces the idea that oil painting is not just about creating art but also about personal growth and self-discovery.