Introduction
Acrylic painting stands as a vibrant testament to the endless possibilities of artistic expression. In this introductory section, we embark on a journey through the rich history, versatile nature, and contemporary relevance of acrylic painting.
Definition and Significance of Acrylic Painting
At its core, acrylic painting is a dynamic form of visual art that utilizes acrylic-based paints as the primary medium for creative expression. What sets acrylics apart is their quick-drying nature, water-solubility, and ability to be used on various surfaces, ranging from traditional canvas to wood, paper, and even fabric. This versatility has made acrylics a favorite among artists of all skill levels, from beginners to seasoned professionals.
The significance of acrylic painting lies in its accessibility and adaptability. Unlike oil paints, which require lengthy drying times and solvents for cleaning, acrylics offer a more user-friendly experience without sacrificing quality or depth of color. This accessibility has democratized the world of painting, allowing aspiring artists to dive into their creative pursuits with ease and confidence.
Brief History and Evolution of Acrylic Paints
The origins of acrylic paints can be traced back to the early 20th century, with the development of synthetic resin-based paints. However, it wasn't until the mid-20th century that modern acrylic paints as we know them today began to take shape. In the 1940s, American chemical engineer Dr. Otto Rohm invented acrylic resin dispersion, which served as the foundation for acrylic paints.
One of the pivotal moments in the history of acrylic painting occurred in the 1950s when artists such as Jackson Pollock and Mark Rothko embraced acrylics for their bold, expressive qualities. These artists pushed the boundaries of traditional painting techniques, paving the way for a new era of experimentation and innovation in the art world.
Since then, acrylic painting has continued to evolve, with artists exploring new techniques, styles, and applications. Today, acrylics are widely celebrated for their versatility, durability, and vibrant colors, making them a staple in studios and galleries around the world.
Importance of Acrylic Painting in Contemporary Art
In the ever-changing landscape of contemporary art, acrylic painting remains a cornerstone of creative expression. Its adaptability to various styles, from hyper-realism to abstract, allows artists to communicate their visions in diverse and compelling ways.
Moreover, acrylic painting serves as a bridge between tradition and innovation, drawing inspiration from centuries-old painting techniques while embracing modern advancements in materials and technology. This fusion of old and new gives acrylic painting a timeless quality, ensuring its relevance in the ever-shifting currents of the art world.
As we delve deeper into the world of acrylic painting, we will explore the essential materials, techniques, and creative processes that define this captivating medium. Whether you're a novice artist taking your first steps or a seasoned painter looking to expand your repertoire, acrylic painting offers a world of possibilities waiting to be explored.
Understanding Acrylic Paints
Acrylic paints are the lifeblood of acrylic painting, offering artists a vast array of colors, textures, and possibilities to bring their visions to life. In this section, we'll delve into the characteristics, types, and comparisons of acrylic paints, providing a comprehensive understanding of this versatile medium.
Characteristics and Properties of Acrylic Paints
Acrylic paints are renowned for their unique characteristics that set them apart from other painting mediums. One of the most notable features of acrylics is their fast-drying nature, which allows artists to work quickly and make rapid adjustments to their compositions. Unlike oil paints, which can take days or even weeks to dry, acrylics typically dry within minutes to hours, depending on factors such as thickness and environmental conditions.
Another key property of acrylic paints is their water-solubility, which enables artists to achieve a wide range of effects by diluting the paint with water. This versatility makes acrylics well-suited for techniques such as glazing, layering, and transparent washes, allowing for depth and luminosity in paintings.
Additionally, acrylic paints offer excellent adhesion to a variety of surfaces, including canvas, paper, wood, metal, and more. This versatility allows artists to explore unconventional surfaces and experiment with mixed-media techniques, expanding the possibilities of their creative practice.
Different Types of Acrylic Paints
Acrylic paints come in a variety of formulations, each with its own unique properties and applications. Some of the most common types of acrylic paints include
Heavy Body Acrylics: These paints have a thick, buttery consistency and are ideal for impasto techniques, building texture, and creating bold, expressive brushstrokes.
Fluid Acrylics: Fluid acrylics have a thinner consistency than heavy body paints, making them well-suited for fine detail work, glazing, and pouring techniques. They offer excellent flow and coverage, allowing for smooth, even application.
Acrylic Gouache: Acrylic gouache combines the matte finish of traditional gouache with the versatility of acrylic paints. It dries to a velvety, opaque finish and can be reactivated with water even after it has dried, making it ideal for layering and reworking.
Open Acrylics: Open acrylics have a longer drying time compared to traditional acrylic paints, allowing artists more time to blend and manipulate the paint on the canvas. They are particularly well-suited for plein air painting and other situations where extended working time is desired.
Comparison with Other Painting Mediums
While acrylic paints offer many advantages, they also have their own set of characteristics that differentiate them from other painting mediums, such as oil and watercolor.
Compared to oil paints, acrylics dry much faster and require less time for cleaning and maintenance. Additionally, acrylics are water-based and non-toxic, making them safer and more environmentally friendly than oil paints, which rely on solvents for thinning and cleaning.
In contrast to watercolor paints, which are transparent and rely on the white of the paper for highlights, acrylics are opaque and can be layered to achieve vibrant, opaque colors. This opacity allows artists to cover mistakes and make corrections more easily, providing greater control over the painting process.
Overall, acrylic paints offer a winning combination of versatility, durability, and ease of use, making them a popular choice among artists of all skill levels. In the following sections, we'll explore the essential materials and techniques needed to unlock the full potential of acrylic painting.
Essential Materials and Tools
To embark on a journey into acrylic painting, it's essential to equip yourself with the right materials and tools. In this section, we'll delve into the key components needed to set up your acrylic painting studio, from paints and brushes to surfaces and accessories.
Overview of Materials Needed for Acrylic Painting
Acrylic painting requires relatively few materials compared to other mediums, making it accessible to artists of all backgrounds and budgets. The essential materials needed for acrylic painting include
Acrylic Paints: As the primary medium of expression, acrylic paints come in a wide range of colors and formulations. Beginners may opt for a basic set of primary colors, while more experienced artists may prefer a broader palette to experiment with.
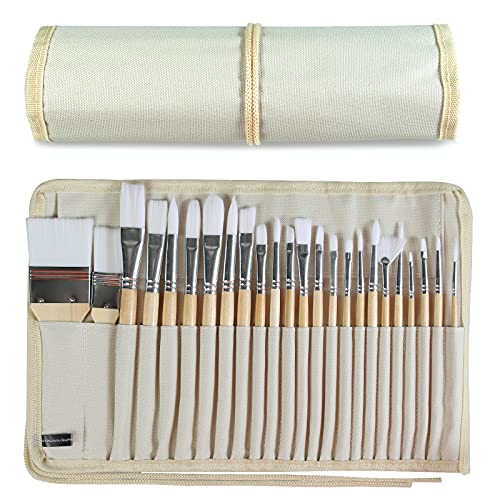
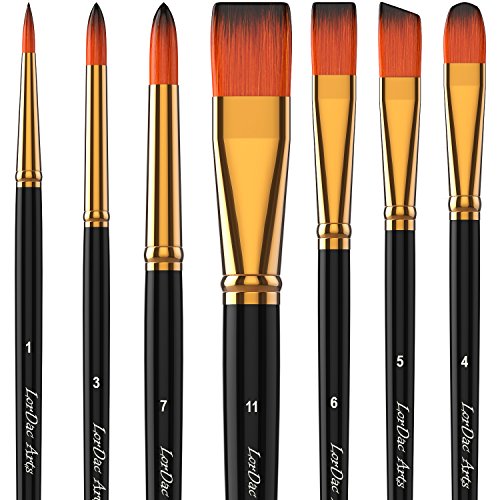
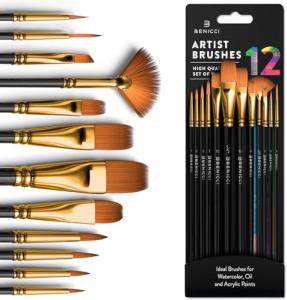
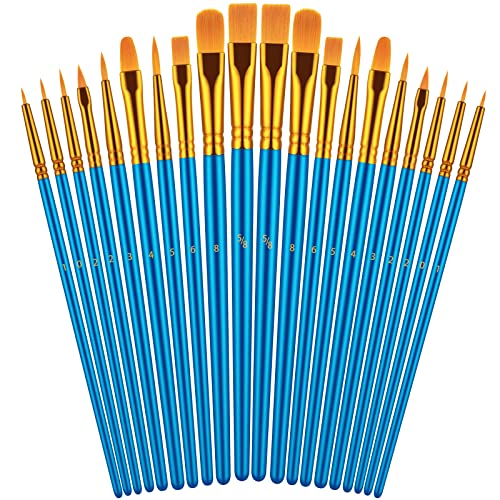
Paint Brushes: A variety of brushes in different shapes and sizes are essential for applying acrylic paints to the canvas. Brushes with synthetic bristles are ideal for acrylic painting, as they are durable and easy to clean.
Painting Surface: Acrylic paints can be applied to a variety of surfaces, including stretched canvas, canvas panels, wood panels, paper, and even fabric. The choice of surface depends on personal preference and the desired effect of the painting.
Palette: A palette is used to mix and blend acrylic paints before applying them to the canvas. Palettes come in various materials, such as plastic, glass, or disposable paper, and can be either flat or handheld.
Palette Knife: Palette knives are versatile tools used for mixing paint on the palette, applying thick impasto layers, and creating texture on the canvas. They come in different shapes and sizes, each suited for specific techniques.
Easel: An easel provides support for the painting surface and allows the artist to work comfortably at an upright angle. Easels come in various styles, including tabletop, floor-standing, and collapsible travel easels.
Water Container: Since acrylic paints are water-based, a container of water is needed for diluting paints, cleaning brushes, and maintaining a wet palette.
Paper Towels or Rags: Paper towels or rags are essential for wiping brushes, cleaning up spills, and blotting excess paint from the canvas.
Protective Gear: While acrylic paints are non-toxic when dry, it's still important to protect yourself from exposure to paint fumes and skin contact. Disposable gloves, aprons, and a well-ventilated workspace are recommended.
Selection of Brushes, Palette Knives, and Other Tools
Choosing the right brushes and tools is crucial for achieving desired effects and mastering various painting techniques. When selecting brushes for acrylic painting, consider factors such as bristle type, shape, and size
Bristle Type: Synthetic bristles are typically preferred for acrylic painting, as they are more durable and resilient than natural hair brushes. They also maintain their shape better when used with acrylic paints.
Brush Shape: Brushes come in a variety of shapes, including round, flat, filbert, and angular. Each shape is suited for specific applications, such as fine detail work, broad strokes, and blending.
Brush Size: The size of the brush determines the width of the strokes and the coverage area. It's essential to have a range of brush sizes to accommodate different painting tasks, from large-scale backgrounds to intricate details.
Palette knives are another indispensable tool for acrylic painters, offering unparalleled versatility and control over paint application. When choosing palette knives, look for sturdy, flexible blades and comfortable handles that allow for smooth manipulation of paint on the palette and canvas.
In addition to brushes and palette knives, other tools and accessories can enhance your acrylic painting experience
Painting Mediums: Acrylic mediums such as gels, pastes, and additives can be mixed with acrylic paints to alter their consistency, drying time, and texture. Experimenting with mediums opens up a world of creative possibilities and allows artists to achieve unique effects in their paintings.
Masking Tape: Masking tape is useful for creating clean edges and sharp lines in acrylic paintings. It can be applied to the canvas before painting to mask off areas and prevent paint from bleeding into unwanted areas.
Spray Bottle: A spray bottle filled with water can be used to keep the paint on the palette and canvas moist, preventing premature drying and allowing for smoother blending and layering.
By investing in high-quality materials and tools tailored to your artistic needs, you'll be well-equipped to unleash your creativity and explore the boundless potential of acrylic painting. In the following sections, we'll delve deeper into setting up your workspace and preparing your painting surface for acrylic painting.
Basic Techniques for Beginners
Embarking on your journey into acrylic painting can feel exhilarating yet daunting, especially if you're just starting out. In this section, we'll explore fundamental techniques tailored for beginners, offering a solid foundation to build upon as you develop your skills and artistic voice.
Fundamental Acrylic Painting Techniques
Brushwork: Mastering brushwork is essential for any acrylic painter. Experiment with different brush sizes and shapes to achieve a variety of strokes, from broad washes to fine details. Practice controlling the pressure and angle of the brush to create varying thickness and texture in your brushstrokes.
Blending: Acrylic paints dry quickly, making blending a crucial skill for achieving smooth transitions between colors. To blend acrylic paints, work quickly and efficiently, applying wet-on-wet layers or using a wet brush to soften edges and blend colors seamlessly.
Layering: Layering is a fundamental technique in acrylic painting, allowing artists to build up colors, depth, and dimension in their artwork. Start with thin, translucent layers of paint and gradually add thicker, more opaque layers to create depth and richness in your paintings.
Dry Brushing: Dry brushing involves applying a small amount of paint to a dry brush and lightly dragging it across the surface of the canvas. This technique is ideal for creating texture, highlighting, and adding detail to your paintings.
Color Mixing Tips and Tricks
Understanding Color Theory: Familiarize yourself with the basics of color theory, including primary, secondary, and tertiary colors, as well as concepts such as hue, saturation, and value. Experiment with mixing different colors to create a wide range of hues and tones.
Limited Palette: Start with a limited palette of primary colors (red, blue, yellow) plus white and black. By mastering the mixing of these primary colors, you can create a vast array of secondary and tertiary colors, giving you greater control over your color palette.
Color Gradation: Practice blending colors smoothly from light to dark or vice versa, creating gradients or transitions between colors. Gradation adds depth and dimension to your paintings, making them more visually appealing and lifelike.
Color Temperature: Explore the concept of color temperature, which refers to the perceived warmth or coolness of a color. Experiment with mixing warm and cool colors to create contrast and visual interest in your paintings.
Simple Exercises for Practicing Brush Control and Texture Creation
Stroke Practice: Set up a blank canvas or paper and practice different brushstrokes, including straight lines, curves, dashes, and dots. Focus on controlling the pressure and movement of the brush to achieve consistent and precise brushwork.
Texture Studies: Experiment with creating various textures using different tools and techniques, such as dry brushing, stippling, sponging, and palette knife techniques. Explore how different surfaces and mediums can affect the texture and appearance of your paintings.
Still Life Studies: Set up a simple still life arrangement with everyday objects and practice painting from observation. Pay attention to the shapes, colors, and textures of the objects, and challenge yourself to capture their likeness and atmosphere using acrylic paints.
Color Mixing Exercises: Create a color mixing chart or grid and experiment with mixing different combinations of primary colors to create secondary and tertiary colors. Label each color swatch and take notes on the proportions of each color used to achieve the desired hue.
By dedicating time to practice these fundamental techniques and exercises, you'll build confidence, improve your skills, and lay the groundwork for more advanced acrylic painting techniques. Remember to embrace experimentation and allow yourself the freedom to make mistakes, as they often lead to unexpected discoveries and creative breakthroughs. In the following sections, we'll explore intermediate techniques and methods to further expand your repertoire as an acrylic painter.
Intermediate Techniques and Methods
As you continue to hone your skills and explore the world of acrylic painting, it's time to delve into intermediate techniques and methods that will elevate your artwork to new heights. In this section, we'll delve deeper into advanced blending, texture creation, and layering techniques, providing you with the tools and knowledge to create dynamic and compelling acrylic paintings.
Advanced Blending and Layering Techniques
Wet-on-Wet Blending: Building upon the basic blending techniques, wet-on-wet blending involves applying wet paint onto an already wet surface. This allows for seamless blending of colors directly on the canvas, creating soft transitions and atmospheric effects. Experiment with blending different colors and opacities to achieve a variety of effects, from smooth gradients to subtle color shifts.
Dry Brush Blending: Dry brush blending is the opposite of wet-on-wet blending and involves applying dry paint onto a dry surface. This technique is ideal for creating texture and depth by layering opaque strokes of paint over a base layer. Use a dry brush and minimal paint to gently blend and feather the edges of the brushstrokes, creating a soft, atmospheric effect.
Scumbling: Scumbling is a texturing technique that involves applying a thin, semi-transparent layer of paint over a dry base layer. Use a dry brush or a sponge to lightly dab or stipple the paint onto the surface, allowing the underlying colors to show through. Scumbling adds visual interest and depth to your paintings, creating a sense of movement and energy.
Glazing: Glazing involves applying thin, transparent layers of paint over a dry base layer to alter the color and appearance of the underlying surface. Use a soft brush and diluted paint to build up layers gradually, allowing each layer to dry before applying the next. Experiment with different colors and opacities to create subtle shifts in hue and tone, adding richness and luminosity to your paintings.
Introduction to Texture Techniques
Impasto: Impasto is a technique in which thick, heavily textured layers of paint are applied to the canvas using a palette knife or brush. Experiment with building up layers of paint to create three-dimensional texture and depth, exploring different application techniques and mark-making tools to achieve a variety of effects. Impasto adds tactile quality and visual interest to your paintings, creating dynamic contrasts of light and shadow.
Collage and Mixed Media: Explore the possibilities of incorporating collage and mixed media elements into your acrylic paintings. Experiment with incorporating found objects, paper, fabric, and other materials into your artwork, combining different textures and surfaces to create richly layered compositions. Collage and mixed media techniques add depth, dimension, and narrative to your paintings, inviting viewers to explore and engage with the artwork on multiple levels.
Sgraffito: Sgraffito is a subtractive technique in which layers of wet paint are scratched or scraped away to reveal the underlying surface. Use a sharp tool such as a palette knife, toothpick, or comb to etch intricate patterns, textures, and details into the paint layers. Sgraffito adds visual interest and depth to your paintings, allowing you to create intricate designs and subtle variations in texture.
Understanding Underpainting and Glazing
Underpainting: Underpainting is the initial layer of paint applied to the canvas before the main composition is developed. Use a monochromatic or complementary color scheme to establish the overall tonal values and composition of your painting. Experiment with different underpainting techniques, such as washes, block-ins, and grisaille, to create a solid foundation for subsequent layers of paint.
Glazing: Building upon the underpainting, glazing involves applying thin, transparent layers of color over the dry base layer to modify the overall color and mood of the painting. Use a soft brush and diluted paint to build up layers gradually, allowing each layer to dry before applying the next. Experiment with different colors and opacities to create subtle shifts in hue and tone, adding depth and luminosity to your paintings.
By mastering these intermediate techniques and methods, you'll expand your creative repertoire and gain the confidence to experiment with new styles and approaches in your acrylic painting practice. Remember to embrace experimentation and allow yourself the freedom to explore and discover new possibilities with each brushstroke. In the following sections, we'll explore subject selection, composition, and the step-by-step process of creating your acrylic paintings.
Subject Selection and Composition
Choosing the right subject and composing your acrylic painting are critical steps in creating a captivating and engaging artwork. In this section, we'll explore strategies for selecting suitable subjects, planning compositions, and translating your artistic vision onto the canvas.
Choosing Suitable Subjects for Acrylic Painting
Still Life: Still life painting offers a wealth of subjects to explore, from everyday objects like fruits, flowers, and household items to more elaborate arrangements featuring pottery, textiles, and decorative elements. Choose subjects that resonate with you personally and offer opportunities for experimentation with color, texture, and composition.
Landscape: Landscape painting allows artists to capture the beauty and essence of the natural world, from sweeping vistas and majestic mountains to tranquil seascapes and intimate garden scenes. Venture outdoors to find inspiration in your surroundings, or draw from photographs and memories to create evocative landscapes that transport viewers to distant places and times.
Portrait: Portrait painting offers a unique opportunity to explore the complexities of the human form and psyche, capturing the likeness, personality, and emotions of the subject. Whether painting from life or reference photos, focus on capturing the essence of the individual through careful observation of facial features, expression, and body language.
Abstract: Abstract painting provides endless possibilities for creative expression, allowing artists to explore color, shape, line, and texture in non-representational ways. Experiment with spontaneous mark-making, intuitive brushwork, and gestural abstraction to create dynamic and expressive compositions that evoke emotions and stimulate the imagination.
Basics of Composition and Design Principles
Rule of Thirds: The rule of thirds is a fundamental compositional guideline that divides the canvas into thirds horizontally and vertically, creating a grid of intersecting lines. Positioning key elements along these gridlines or at their intersections can create balance, harmony, and visual interest in your compositions.
Balance: Balance refers to the distribution of visual weight within a composition, achieved through the arrangement of elements such as color, shape, texture, and space. Aim for a sense of equilibrium between different parts of the painting, avoiding overly crowded or empty areas that can disrupt the overall harmony.
Unity and Variety: Unity refers to the cohesive relationship between elements within a composition, while variety adds visual interest and complexity. Strive to strike a balance between unity and variety by incorporating elements that complement each other while also introducing diversity in color, shape, texture, and form.
Negative Space: Negative space, or the empty areas surrounding the main subject, plays a crucial role in composition, providing context, balance, and breathing room for the eye. Pay attention to the relationship between positive and negative space, using it to create visual tension, contrast, and depth in your compositions.
Sketching and Planning Your Painting
Thumbnail Sketches: Before starting your painting, take time to create thumbnail sketches to explore different compositions, perspectives, and ideas. Keep these sketches loose and spontaneous, focusing on capturing the essence of the subject and experimenting with different arrangements and focal points.
Value Studies: Value studies involve simplifying the subject into basic shapes and values to establish the overall tonal structure of the painting. Use a limited palette of black, white, and gray to map out the light and shadow patterns, identifying areas of high contrast and focal points.
Color Studies: Color studies allow you to experiment with different color schemes and harmonies before committing to the final painting. Create small, simplified versions of your composition and explore different color combinations, observing how they affect the mood, atmosphere, and visual impact of the painting.
Composition Grids: Consider using compositional grids or guidelines to help plan and structure your painting. These grids can be as simple as dividing the canvas into thirds or as complex as incorporating geometric shapes and golden ratios to guide the placement of key elements and create a sense of balance and harmony.
By carefully selecting subjects, applying compositional principles, and planning your painting in advance, you'll set yourself up for success and create artworks that resonate with viewers on a deeper level. In the following sections, we'll explore the step-by-step process of bringing your acrylic paintings to life, from blocking in colors to adding final touches and details.
Step-by-Step Painting Process
Now that you've chosen your subject, planned your composition, and gathered your materials, it's time to dive into the step-by-step process of creating your acrylic painting. In this section, we'll walk through the key stages of painting, from preparing the canvas to adding final touches and details, guiding you through each step of the creative journey.
Preparing the Painting Surface and Workspace
Surface Preparation: Start by preparing your painting surface, whether it's a stretched canvas, canvas panel, wood panel, or paper. If using canvas, you may want to apply a layer of gesso to prime the surface and create a smooth, absorbent base for the paint. Allow the gesso to dry completely before proceeding.
Workspace Setup: Set up your painting area in a well-lit, well-ventilated space with ample room to work comfortably. Arrange your materials and tools within easy reach, keeping your palette, brushes, water container, and painting medium nearby. Consider using an easel to support your canvas and allow for better posture while painting.
Blocking in Colors and Establishing the Underpainting
Sketching the Composition: Begin by lightly sketching the main elements of your composition onto the canvas using a pencil or thin brush dipped in a neutral color. Focus on capturing the basic shapes, proportions, and placement of objects, using your thumbnail sketches and reference photos as guides.
Blocking in Colors: Once the composition is sketched, start blocking in the base colors using broad, gestural brushstrokes. Use a large brush and thinned-down paint to establish the overall tonal values and color relationships, working from general to specific areas of the painting.
Establishing the Underpainting: With the base colors blocked in, focus on establishing the underpainting by refining the shapes, values, and proportions of the major elements in the composition. Use a combination of opaque and transparent layers to build up depth and dimension, paying attention to light and shadow patterns.
Layering, Refining Details, and Adding Highlights
Building Up Layers: Once the underpainting is established, begin layering additional colors and details to further develop the painting. Work from background to foreground, gradually building up layers of paint to create depth, texture, and atmosphere in the scene. Experiment with different brushes, tools, and techniques to achieve the desired effects.
Refining Details: As you progress, focus on refining the details and textures of the painting, paying close attention to subtle variations in color, value, and texture. Use smaller brushes and fine-tipped tools to add intricate details, highlights, and accents, bringing the scene to life with precision and clarity.
Adding Highlights: Once the main elements of the painting are in place, focus on adding highlights and final touches to enhance the overall impact and visual interest. Use a lighter value of paint to create highlights on surfaces that catch the light, such as edges, surfaces, and focal points. Pay attention to the direction and intensity of light sources to create realistic and dynamic lighting effects.
Final Touches and Varnishing for Protection and Enhancement
Final Touches: Step back and assess your painting as a whole, making any final adjustments or refinements as needed. Take the time to fine-tune colors, values, and compositions, ensuring that every element contributes to the overall harmony and unity of the painting.
Varnishing: Once your painting is complete and fully dry, consider applying a layer of varnish to protect and enhance the finished artwork. Varnish adds a protective coating that guards against dust, dirt, and UV damage, while also intensifying colors and providing a uniform sheen across the surface. Choose a varnish that is compatible with acrylic paints and follow the manufacturer's instructions for application and drying times.
By following these step-by-step guidelines and techniques, you'll be able to confidently navigate the painting process and create acrylic artworks that reflect your unique style, vision, and creativity. Remember to embrace experimentation, practice patience, and trust in your instincts as you bring your acrylic paintings to life on the canvas. In the following sections, we'll explore troubleshooting common issues and mistakes, as well as caring for and displaying your finished artworks with pride.
Troubleshooting and Problem Solving
Even the most experienced artists encounter challenges and setbacks in their painting process. In this section, we'll address common issues and mistakes that may arise during acrylic painting and provide practical tips and strategies for troubleshooting and problem-solving.
Dealing with Paint Drying Too Quickly or Too Slowly
Paint Drying Too Quickly: If your acrylic paint is drying too quickly on the palette or canvas, consider using a palette with airtight compartments or a wet palette to keep the paint moist for longer periods. You can also mist the surface of the paint with water or acrylic retarder to slow down the drying time and extend your working window.
Paint Drying Too Slowly: Conversely, if your acrylic paint is drying too slowly, you can speed up the drying process by increasing ventilation and airflow in your workspace. Avoid overloading the canvas with thick layers of paint, as this can prolong drying times. Additionally, consider using mediums such as acrylic drying accelerators or fast-drying gels to expedite drying times and allow for quicker layering and painting.
Avoiding Muddy Colors
Clean Brushes and Palette: One common cause of muddy colors is cross-contamination of paint on the palette or brushes. Make sure to clean your brushes thoroughly between color changes and use separate wells or areas on the palette for mixing different colors. Additionally, avoid mixing too many colors together on the palette, as this can result in a dull, muddy appearance.
Layering and Transparency: To maintain color clarity and vibrancy, consider building up layers of transparent or semi-transparent glazes rather than mixing colors directly on the canvas. This allows underlying colors to show through and creates depth and luminosity in the painting. Experiment with translucent colors and glazing techniques to achieve rich, vibrant hues without muddying the colors.
Fixing Mistakes Without Ruining the Painting
Patience and Persistence: Mistakes are inevitable in the creative process, but they can often be corrected with patience and persistence. Allow yourself the freedom to make mistakes and view them as learning opportunities rather than failures. Take breaks when feeling frustrated and return to the painting with fresh eyes and a renewed perspective.
Blending and Layering: Many mistakes can be corrected through blending and layering techniques. If a color or shape doesn't turn out as expected, you can often blend it into the surrounding areas or layer additional paint on top to adjust the appearance. Use thin, translucent layers to gradually build up corrections and modifications without obscuring the underlying layers.
Scraping and Sanding: In some cases, it may be necessary to remove or adjust areas of the painting that are not working. You can use a palette knife or sandpaper to gently scrape away paint or smooth out rough areas on the canvas. Take care not to damage the underlying layers, and remember that imperfections can add character and authenticity to the artwork.
By understanding common issues and implementing effective problem-solving techniques, you'll be better equipped to navigate the challenges of acrylic painting and achieve the results you desire. Remember to stay open-minded and adaptable, and don't be afraid to experiment and explore new approaches to overcome obstacles in your artistic practice.
Caring for Your Acrylic Paintings
Your acrylic paintings are not just works of art; they are also investments of time, effort, and creativity. Proper care and maintenance are essential to ensure that your artworks remain vibrant and beautiful for years to come. In this section, we'll discuss best practices for storing, cleaning, and displaying your acrylic paintings to preserve their longevity and integrity.
Proper Storage and Preservation Techniques
Avoid Extreme Temperatures and Humidity: Acrylic paintings are sensitive to fluctuations in temperature and humidity, which can cause the paint to crack, warp, or become discolored over time. Store your paintings in a cool, dry environment away from direct sunlight, heat sources, and moisture, such as basements, attics, or damp rooms.
Protective Packaging: When transporting or storing your acrylic paintings, take care to protect them from scratches, dents, and other damage. Wrap the paintings in acid-free tissue paper or glassine and place them in sturdy cardboard boxes or portfolios lined with foam padding or bubble wrap. Avoid stacking paintings on top of each other to prevent pressure and compression damage.
Proper Framing and Mounting: If framing your acrylic paintings, choose archival-quality materials, including acid-free mats, backing boards, and UV-protective glazing. Ensure that the frame is sturdy and securely attached to the painting to prevent warping or sagging over time. If mounting the painting without a frame, use acid-free adhesive or mounting corners to attach it to a rigid support such as foam board or Gatorboard.
Cleaning and Maintenance of Acrylic Paintings
Dust Regularly: Dust and dirt can accumulate on the surface of acrylic paintings over time, dulling their colors and obscuring details. To keep your paintings clean, dust them regularly using a soft, dry brush or microfiber cloth. Gently brush the surface in a downward motion to remove loose dust particles, taking care not to apply too much pressure or disturb the paint layers.
Avoid Wet Cleaning: Unlike oil paintings, which can withstand gentle cleaning with solvents, acrylic paintings are more sensitive to water and chemical cleaners. Avoid wet cleaning methods, as they can cause the paint to soften, lift, or become discolored. If necessary, consult a professional conservator for advice on safe cleaning methods for your specific painting.
Handle with Care: When handling acrylic paintings, avoid touching the surface with bare hands, as oils and residues from the skin can transfer onto the paint and cause damage over time. Instead, hold the painting by the edges or use clean, lint-free gloves to protect the surface from fingerprints and smudges.
Displaying Your Acrylic Paintings Effectively
Choose Suitable Display Locations: When displaying your acrylic paintings, choose locations that are free from direct sunlight, heat sources, and high humidity, as these can cause fading, discoloration, and deterioration of the paint over time. Consider hanging paintings in well-lit areas where they can be appreciated without being exposed to excessive light or environmental conditions.
Proper Hanging and Mounting: When hanging acrylic paintings, use sturdy picture hooks or wall anchors to support the weight of the artwork and prevent it from falling or becoming damaged. Ensure that the painting is securely attached to the wall using appropriate hanging hardware and that the hanging wire is evenly distributed across the back of the frame.
Rotate and Refresh: To prevent fading and uneven wear, consider rotating your acrylic paintings periodically and displaying different artworks in the same space. This not only ensures that all your paintings receive equal exposure but also allows you to enjoy a fresh perspective on your collection over time.
By following these guidelines for storing, cleaning, and displaying your acrylic paintings, you can prolong their lifespan and maintain their beauty and integrity for generations to come. Remember that proper care and maintenance are essential investments in preserving the value and enjoyment of your artwork, ensuring that it continues to bring joy and inspiration to viewers for years to come.
Summary Acrylic Painting
Acrylic painting offers artists a versatile and dynamic medium to express their creativity and bring their artistic visions to life. In this comprehensive guide, we explored various aspects of acrylic painting, from understanding the characteristics and types of acrylic paints to mastering fundamental techniques and advanced methods. We discussed essential materials and tools, including paints, brushes, surfaces, and accessories, and provided practical tips for selecting subjects, planning compositions, and executing acrylic paintings step by step.
Additionally, we addressed common challenges and mistakes that artists may encounter during the painting process, offering troubleshooting strategies and problem-solving techniques to overcome obstacles and achieve desired results. We emphasized the importance of proper care and maintenance for preserving acrylic paintings, including storage, cleaning, and displaying methods to ensure their longevity and integrity.
Overall, this guide serves as a comprehensive resource for artists of all skill levels seeking to explore the vibrant and dynamic world of acrylic painting. Whether you're a beginner looking to learn the basics or an experienced artist seeking to expand your repertoire, acrylic painting offers endless possibilities for creativity, expression, and artistic growth. With dedication, practice, and experimentation, you can unlock the full potential of acrylic painting and create artworks that inspire and delight viewers for years to come.